It was a grey morning
on Sunday when we all got to Titan Wargames club in north London. Tables were
already set up when I arrived and at the start I had a chance to catch up with
Faan, the Dutchman who flew from Holland specifically for this event (as well
as a couple of previous singles and doubles events in Nottingham). His army
looked dreadfully powerful – 20+ Fountain Guards supported by Elves, led by
Galadriel... my Goblins were already shaking in their case.
Then there was the arrival of the recent Grinstead 750 tournament winner Damian with his Saruman and fearful Feral Uruk-hai. At some point the northerners stumbled into the hall – league’s 2nd, 3rd, 5th and 7th with their cheesy armies made up of 8 Fell Beasts, 2 Sarumans and a million Blackshields between them.
Then there was the arrival of the recent Grinstead 750 tournament winner Damian with his Saruman and fearful Feral Uruk-hai. At some point the northerners stumbled into the hall – league’s 2nd, 3rd, 5th and 7th with their cheesy armies made up of 8 Fell Beasts, 2 Sarumans and a million Blackshields between them.
Did I expect to do well? Having just over 50 basic Goblins (not a single Prowler or Blackshield!), without a Spider Queen (dropped it last minute) and a general who is usually dreadfully afraid to charge into combat because of too big chance of losing against... everything... and giving the opponent free points? Not really. But it worked. Somehow... To my surprise... And everybody else’s! :D
The development of my list began few weeks ago. The first incarnation was:
Durburz
2 Shamans
3 Goblin Captains
71 Goblins
4 Bat Swarms
2 Shamans
3 Goblin Captains
71 Goblins
4 Bat Swarms
That looked miserable
and I only had 1 Bat swarm... plus it wasn’t legal in numbers... It changed
into...
Durburz
2 Shamans
4 Blackshield Shamans
20 Naked Goblins
20 Goblins with Shield
40 Goblins with Spear.
2 Shamans
4 Blackshield Shamans
20 Naked Goblins
20 Goblins with Shield
40 Goblins with Spear.
87 models was great,
but that’s a dreadfully boring list. So I added a Spider Queen instead of 1 BSS
and a warband. That looked all right, except the SQ feels so vulnerable these
days with all the Heroic Strikes. I started considering Marauders out lack of
ideas and mixing with Bat Swarms. I even said this to Sam J on Facebook:
“Marauders and bats are useless if
you're goblins”
I still stand by the latter part of this
sentence because halving fight value of heroes with F5+ means nothing when
you’re F2. But I reconsidered the Marauders in respect to the meta and ended up
with this list:
Durburz
2 Goblin Shamans
2 Blackshield Shamans
26 Goblins with Shield
25 Goblins with Spear
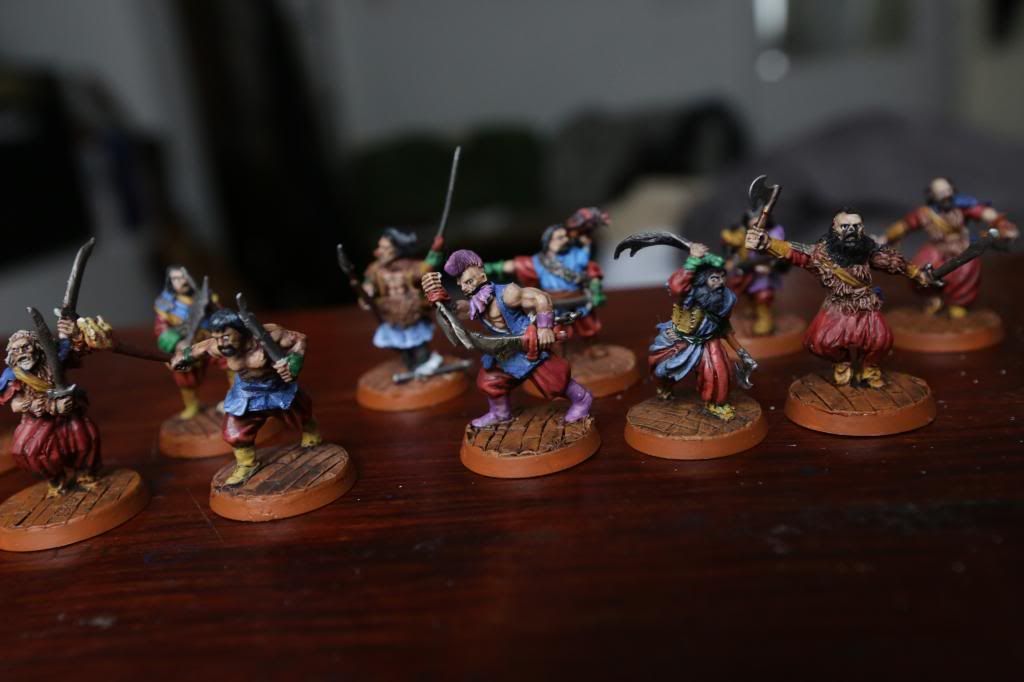
6 Marauders
3 Wild Wargs
2 Goblin Shamans
2 Blackshield Shamans
26 Goblins with Shield
25 Goblins with Spear
6 Marauders
3 Wild Wargs
749, 65 models, 7 Might. Warband split was
4 Shamans with 6/6 goblins each and Durburz’s warband had 2 shields, 1 spear, 6
marauders and 3 wild wargs.
You could say this was crazy and looking at
this list I don’t know what I’m doing, but hear this: There were 6 scenarios. 5
of them were heavily number-based (Recon, Domination, Hold Ground, Hobbits and
To the Death). Designing a force for the scenario meant for me that Moria is
probably the best option because it can reach huge numbers. Based on my
competitive experience I knew that there would be others who will think this
way. However, with the warband rules and the fact that heroes aren’t cheap I
knew that mid 40s to mid 50s is the maximum anyone will have. I knew because
everybody a) loves monsters and b) loves heroes.
I know the meta relatively well, so I
established that a good list in 750pts would have a large hero, often times a
wizard or some sort of a monster. What do wizards excel at? Killing heroes.
Hence my thought ‘let’s give them 0 targets and take the cheapest heroes’. What
do monsters and heroes excel at? Killing masses. What do heroes hate? Being up
against models they can’t afford to get beaten by (for example 2 Warg Riders
attacking a lonely hero is a dangerous moment for any hero because without a 6
he’s facing 8 strikes with S4). So I thought let’s give them big bodies to
fight and burn Might on, ie. Marauders. There is a second point, far more
important, why I chose Marauders though. Given that the best forces I thought
in these scenarios would be large Morias I had to have some sort of an edge in
the mirror match. Blackshields would demolish me on normal basis, but they die
to F3 S4, so there we have it… 6 Marauders are capable (as proven later in this
report) of demolishing a wall of Blackshields (or any other in fact) in
astonishing speed.
Game 1 – Modified
Reconnoitre vs Sam. League Rank – 3rd
For the first round I
received a grudge from Sam, who clearly wanted to prove to me that his Moria
force filled with Blackshields and led by Saruman with around 40 models in
total is better than mine. It was a good point to test out if my theory about
Marauders worked.
The game started with
Sam’s entire army not arriving in turn 1, but most of it turned up in turn 2.
Grima got attached to Durburz’s warband and blocked with 3 goblins on the edge
of the board the moment he appeared. It wasn’t a very eventful game. We both
pushed forward, started fighting, Marauders destroyed a large chunk of his
force due to F3 with 4 attacks, General was killed and I was left unbroken. 5
VPs for having at least 3 times as many models off the board as the opponent.
11-0 in VPs


Game 2 – Lords of
Battle vs Damian. League Rank – 4th
This was not going to
be an easy game. First of all this was the only scenario at which my army
was in theory rubbish. Damian’s army
contained just over half of the numbers of my force and most of it were Ferals
with 2 attacks and FV 4. In addition he had Saruman and 2 Uruk Hai heroes with
F5 and 3 Might (Vrashku and Lurtz) and an Uruk Shaman for those 5+ saves. Did I
mention 11 or so Crossbowmen? Very hard match up for Goblins.
It begun with the
forging of the Great Rings. 3 of those...
Now some of you will
compare this description of events with Damian’s version. Let’s just say there
were two different perspectives and perhaps what I’ll forget to mention he does
and what he forgets I do!
It begun with setting
up in very little amount of space, what meant that for most of the game one of
my warbands was completely useless. Grima spent his time near Durburz and a
normal Shaman for most of the match too. My centre had 2 warbands of Goblins
facing a band of crossbowmen and a band of Ferals, while my right flank had 2
bands of Goblins clumped in an unmovable block and a band of Marauders on the
side ready to fight.
On the first turn
Damian called a heroic move and moved forward, hoping to block off my Marauders
from coming from behind the Goblins. That meant that I was able to cast a
tremor against his nicely lined up Ferals, killing about 4 or 5 and charging
with my goblins and Marauders. This was the only scenario which didn’t grant
points for killing the General, so I was happy to get Durburz involved in
combat with his F4.
At some point Damian
made a crucial mistake by calling a heroic move to counter mine, then after I
moved and after he moved his heroic (ie. Ended his move phase effectively) I
was able to move large chunk of my force into safety and stop him from shooting
with about 8 crossbows, while keeping them unengaged.
For most of the battle
we were swinging within 2 VPs of each other. Once I broke Damian I went ahead 5
VPs, but a pretty fortunate Sorcerous Blast made it even. Then came the moment
when Lurtz with just 1 Might point charged
2 supported (ridiculous new rule with spear supporting!) Marauders and died,
while Saruman got surrounded by a Marauder and 2 goblins and also died (with
admittedly large portion of luck). Now to be honest I don’t think Lurtz’s death
played a major role, because if he had won and caused a wound there was still
Saruman facing 5 attacks and anything but a 5 or 6 meant him probably taking
2-3 wounds and using up 1-2 Fate, giving me enough of an edge. They both died,
unexpectedly, but I think given the situation I had a fair advantage in both
combats.
36-27 in VPs


Game 3 – Domination vs
James. League Rank – 5th
4 Fell Beasts vs 65
models in a game where you have to capture objectives. Sounds easy enough, but
it isn’t, because if I break and my heroes are killed, with effective Courage 1
in the whole army this can easily turn into an 18-0 win for James (who just
victoriously finished an 8 Fell Beasts clash on table 1). Add to that the fact
that James is an outstanding player, has several years of experience, including a GT win. From the
start my Goblins felt uneasy.
We set up relatively
far away from each other. I decided to make my army into a 2x2-deep wall with
gaps in between the ranks and between models large enough to avoid major damage
from hurling. On turn 1 I decided to send forward a BS Shaman and cast a
Shatter at Knight of Umbar to force some Will and possibly Might burning. If I
stayed back I’d be sapped on 1 dice, if I went forward I might force 3+ dice
resist and perhaps even with a lot of luck make him unarmed, so I thought it
would be worth it.
James quickly engaged,
but by doing so also made a crucial mistake, leaving one of my Shamans with
full Will. (Due to my lack of rules knowledge I decided to resist a Sap Will
with the other Shaman on 2 dice, making him unable to cast Fury afterwards – of
course that was intentional to confuse my enemy and leave him dazzled why would
I make such a silly mistake!).
Having failed to Sap
the 2nd Shaman I managed to cast Fury and engage his Ringwraiths,
quickly eliminating 1 Fell Beast. By my own second mistake I left Durburz too
vulnerable, so James rightfully tried to quickly take him out by sending a
Wraith into combat. It was a rather risky move though, but due to the order of
events I wasn’t able to call a Heroic Strike (it can be called at the beginning
of the phase, but James moved into Durburz after a successful Heroic Combat).
Luckily I won the fight and survived. Next turn James charged again, but due to
Heroic Strike weak heroes are now much harder to remove and after my lucky
Durburz made it into F10 against his F9 Wraith I won the combat (I had a few
extra attacks for the countercharge) and got into safety next turn, while
pinning down 1 wraith away from the rest – phew!
Soon after the second
Fell Beast died and at that point James was running low on Might with me still
far from breaking. After the death of 2 ‘Fellbeastless’ Wraiths he decided to
end the game by flying onto an objective with one and casting a Compel to move
my Marauder from away from it with the other, sacrificing the wraith and
reducing his force to 25%.
15-3 in VPs


Game 4 – Hold Ground
vs Joe. League Rank – 20th
Another monster mash. Joe
had a Troll Chieftain, Goblin King, 2 Cave Trolls, Dwimmerlaik, Burhdur and a
Dragon Knight on a horse.
In this game I got a
bit lucky with my BS shamans in that I successfully shattered 3 monsters. On
the other hand my normal Shamans ended up too close to Dwimmerlaik to have any
effect and most of the game I spend on failing courage tests with vast majority
of my toys.
Other than causing 7
wounds on shattered Goblin King, only to see him survive and then causing
another 10 to finally watch him die it wasn’t a very eventful game. The
strategy from the beginning was to throw everything into the centre, slow the
monsters down from reaching the objective and hope I don’t die before the game
ends.
27-6 VPs as far as I
remember.

Earlier we fought in front of Erebor, now we were finally in it!


Game 5 – To The Death
vs Jamie. League Rank – 2nd
Entire previous evening
and most of the morning I spent thinking what will I do against Jamie’s force.
It seemed he had everything – Saruman to blast my ranks, Blackshields for me to
bounce off, a Ringwraith to drain my Shamans. F3 orc spearmen to fight back my
F2. Everything was just so good about his army, along with 54 models, most I’d
seen so far. And he had a banner – automatic 2 points edge over me, so all he
needed was to kill Durburz and he wouldn’t be able to lose anymore.
We set up with 2
double ranks in front of each other, with me preparing to lose a large chunk of
models very quickly to his superior force. Jamie set his Saruman far away from
my 2 BS shamans because he knew that I could try to cast 2 Shatters that would
remove his Staff of Power granting the precious free Will. In turn 1 I decided
that I will abandon the Shatter idea because he’s too far, so he can move
forward, blast and move back. I also thought I really need Tremors much more,
so ended up casting both on 3 Will each. After successfully casting both I was
already on about 5 or 6 kills and a lot of models on the ground, providing
automatic protection in case I would lose combats. On the left flank I sent as
many Marauders as would fit into combat (4 I believe) against the F2/D6 troops
(I waited with their deployment to see where the F3 orcs would be set and then
I put myself on the exact opposite flank from them).
In turn 1 with Saruman
far away Jamie couldn’t deal much damage, the Ringwraith didn’t really have
much of a target because from the start I kept Durburz far away from danger, so
making about 250 points of his army useless was a good thing to start with.
There was also a bit of luck in that Jamie failed to cast Fury twice with one
of Shamans.
After the first round
of combat Marauders absolutely shattered the entire flank and from an edge of
11 models to start with I already had an advantage of 20, having lost only 3 or
4 goblins and killed about 12 in return. Suddenly I felt much better about my
chances. For the next couple of turns Marauders kept wrecking havoc on the
flank, a couple of them along with Wild Wargs went to chase Saruman and on the
way accidentally killed Groblog.
After gaining a big
number edge the left flank simply closed on Jamie’s forces and there wasn’t
anything he could do, as I finished the game with about 15 models off breaking
point and Durburz miles away from danger of any sorts.
5-2 in VPs.


Game 6 – Longbottom
Carnival vs Tom. League Rank – 1st
After round 5 I felt
fairly confident that I was going to win the tournament, but what better way to
win it than to beat the current league leader!
I played Tom once
before, 2 months ago and my silly mistake in the last turn (walking models off
the objective?!) cost me the game, so this time we both reminded each other not
to do that at the start.
Tom had a force made
up of Gandalf the White, some WoMT, some Fountain Guards and some Citadel
Guards, along with Faramir and Pippin. Total of 41 models I believe. He was
first to deploy and ended up starting with 2 warbands in 1 corner, 1 in the
other and Gandalf supporting the lonely band. Opposite the lone band entered a
Shaman and 12 goblins and in a different corner entered the other Shaman and 12
goblins. Tom then made a slight mistake, forgetting about Tremor and allowed me
to enter the board just behind his forces and losing 4 models to the spell.
Next up was a BS Shaman deployed by myself who appeared nearby and failed to
cast a perfect 7-model-hitting Tremor rolling a 1,1,1.
Soon after the first
turn the Marauders got dangerously close to Tom’s forces and managed to cut off
his entrance to the centre.
This was the scenario
where Wild Wargs were supposed to shine, and so they did, by stealing 2
objectives from the centre and far left corner before Tom managed to claim them
for himself. The game started with a score of 2-2, but soon turned into 6-4 in
my favour. After a few turns of combat, most of Tom’s army was mostly destroyed
and Goblins claimed 2 objectives back.
11-2 in VPs


And thus the forces of
Moria claimed the Key to the Lonely Mountain. In summary it has been a great
tournament, organisation was spot on, tables looked awesome, player behaviour
(at least in the case of my opponents) was superb and the event brought back the
nostalgia of the carefree toy playing.
The plan of Marauders
and a mass of Goblins worked perfectly, but to my surprise the 2nd
and 3rd lists did not feature as many models as I expected – around
40 in 2nd and 5 in 3rd.
Thanks to all of my
opponents, the organisers and everyone who attended for your support of the
hobby and the league.
BlackMist


